

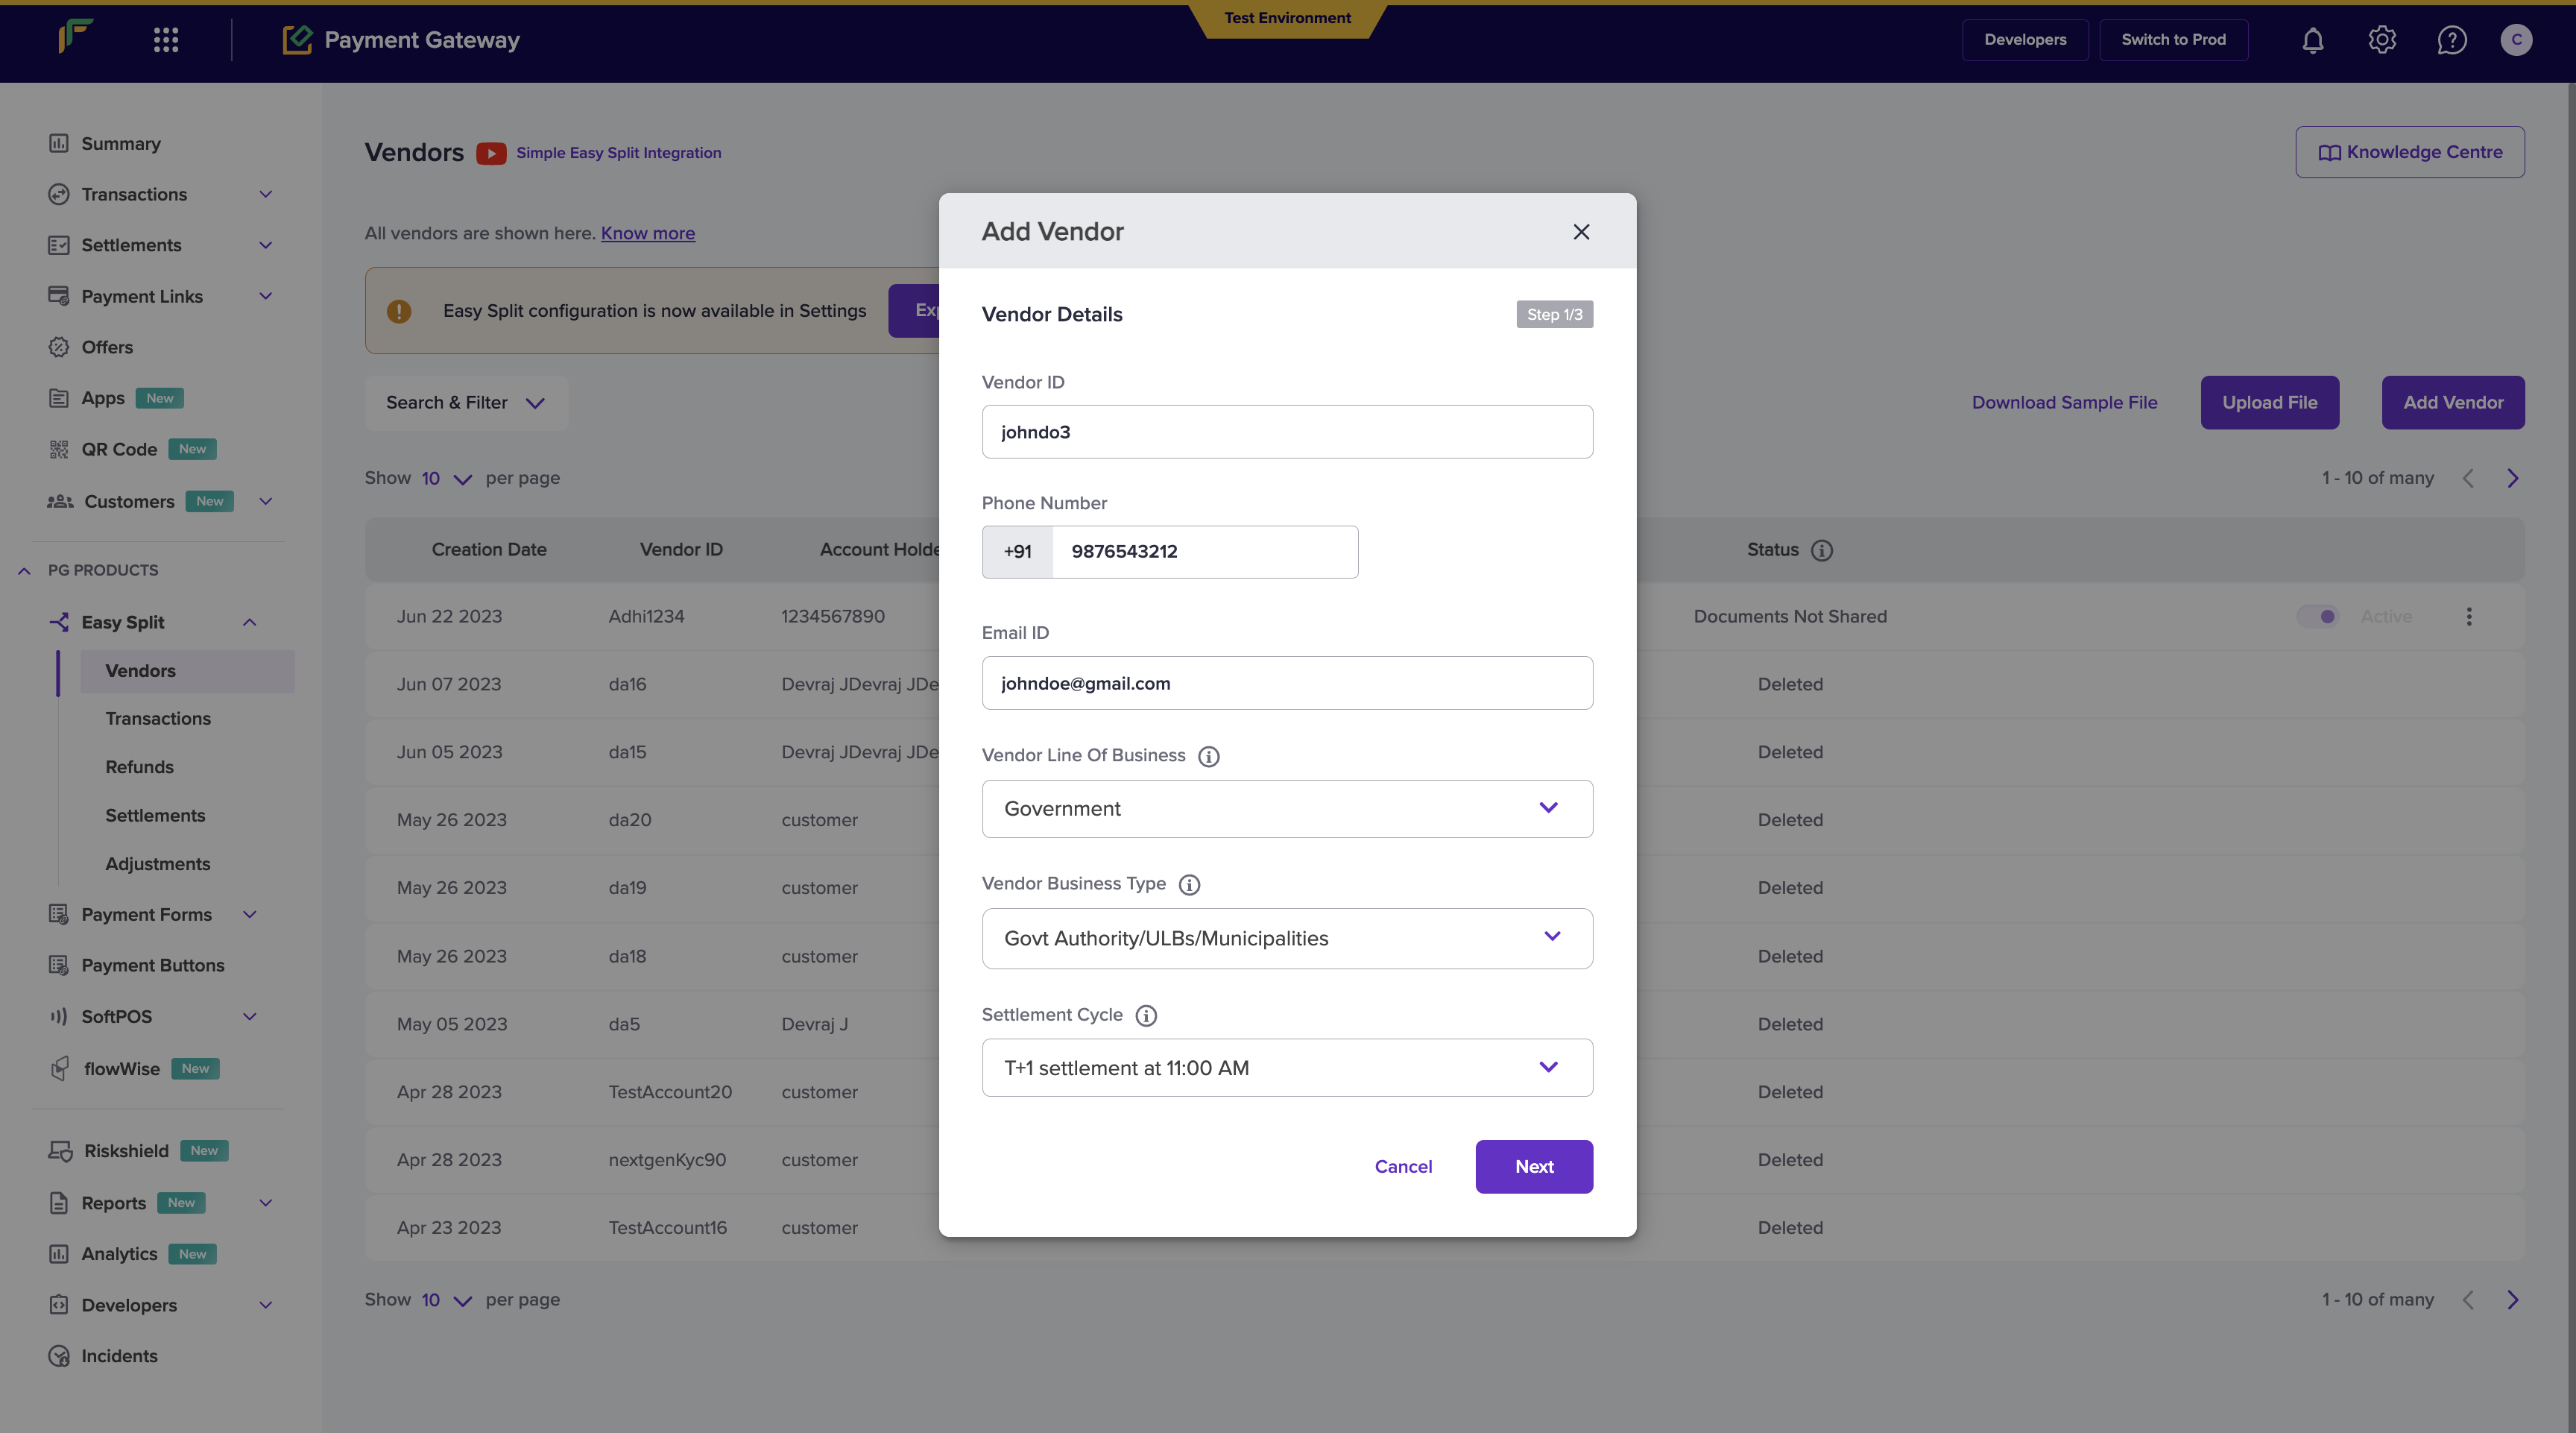
- Go to Payment Gateway Dashboard > Easy Split - Vendor > Add Vendor.
-
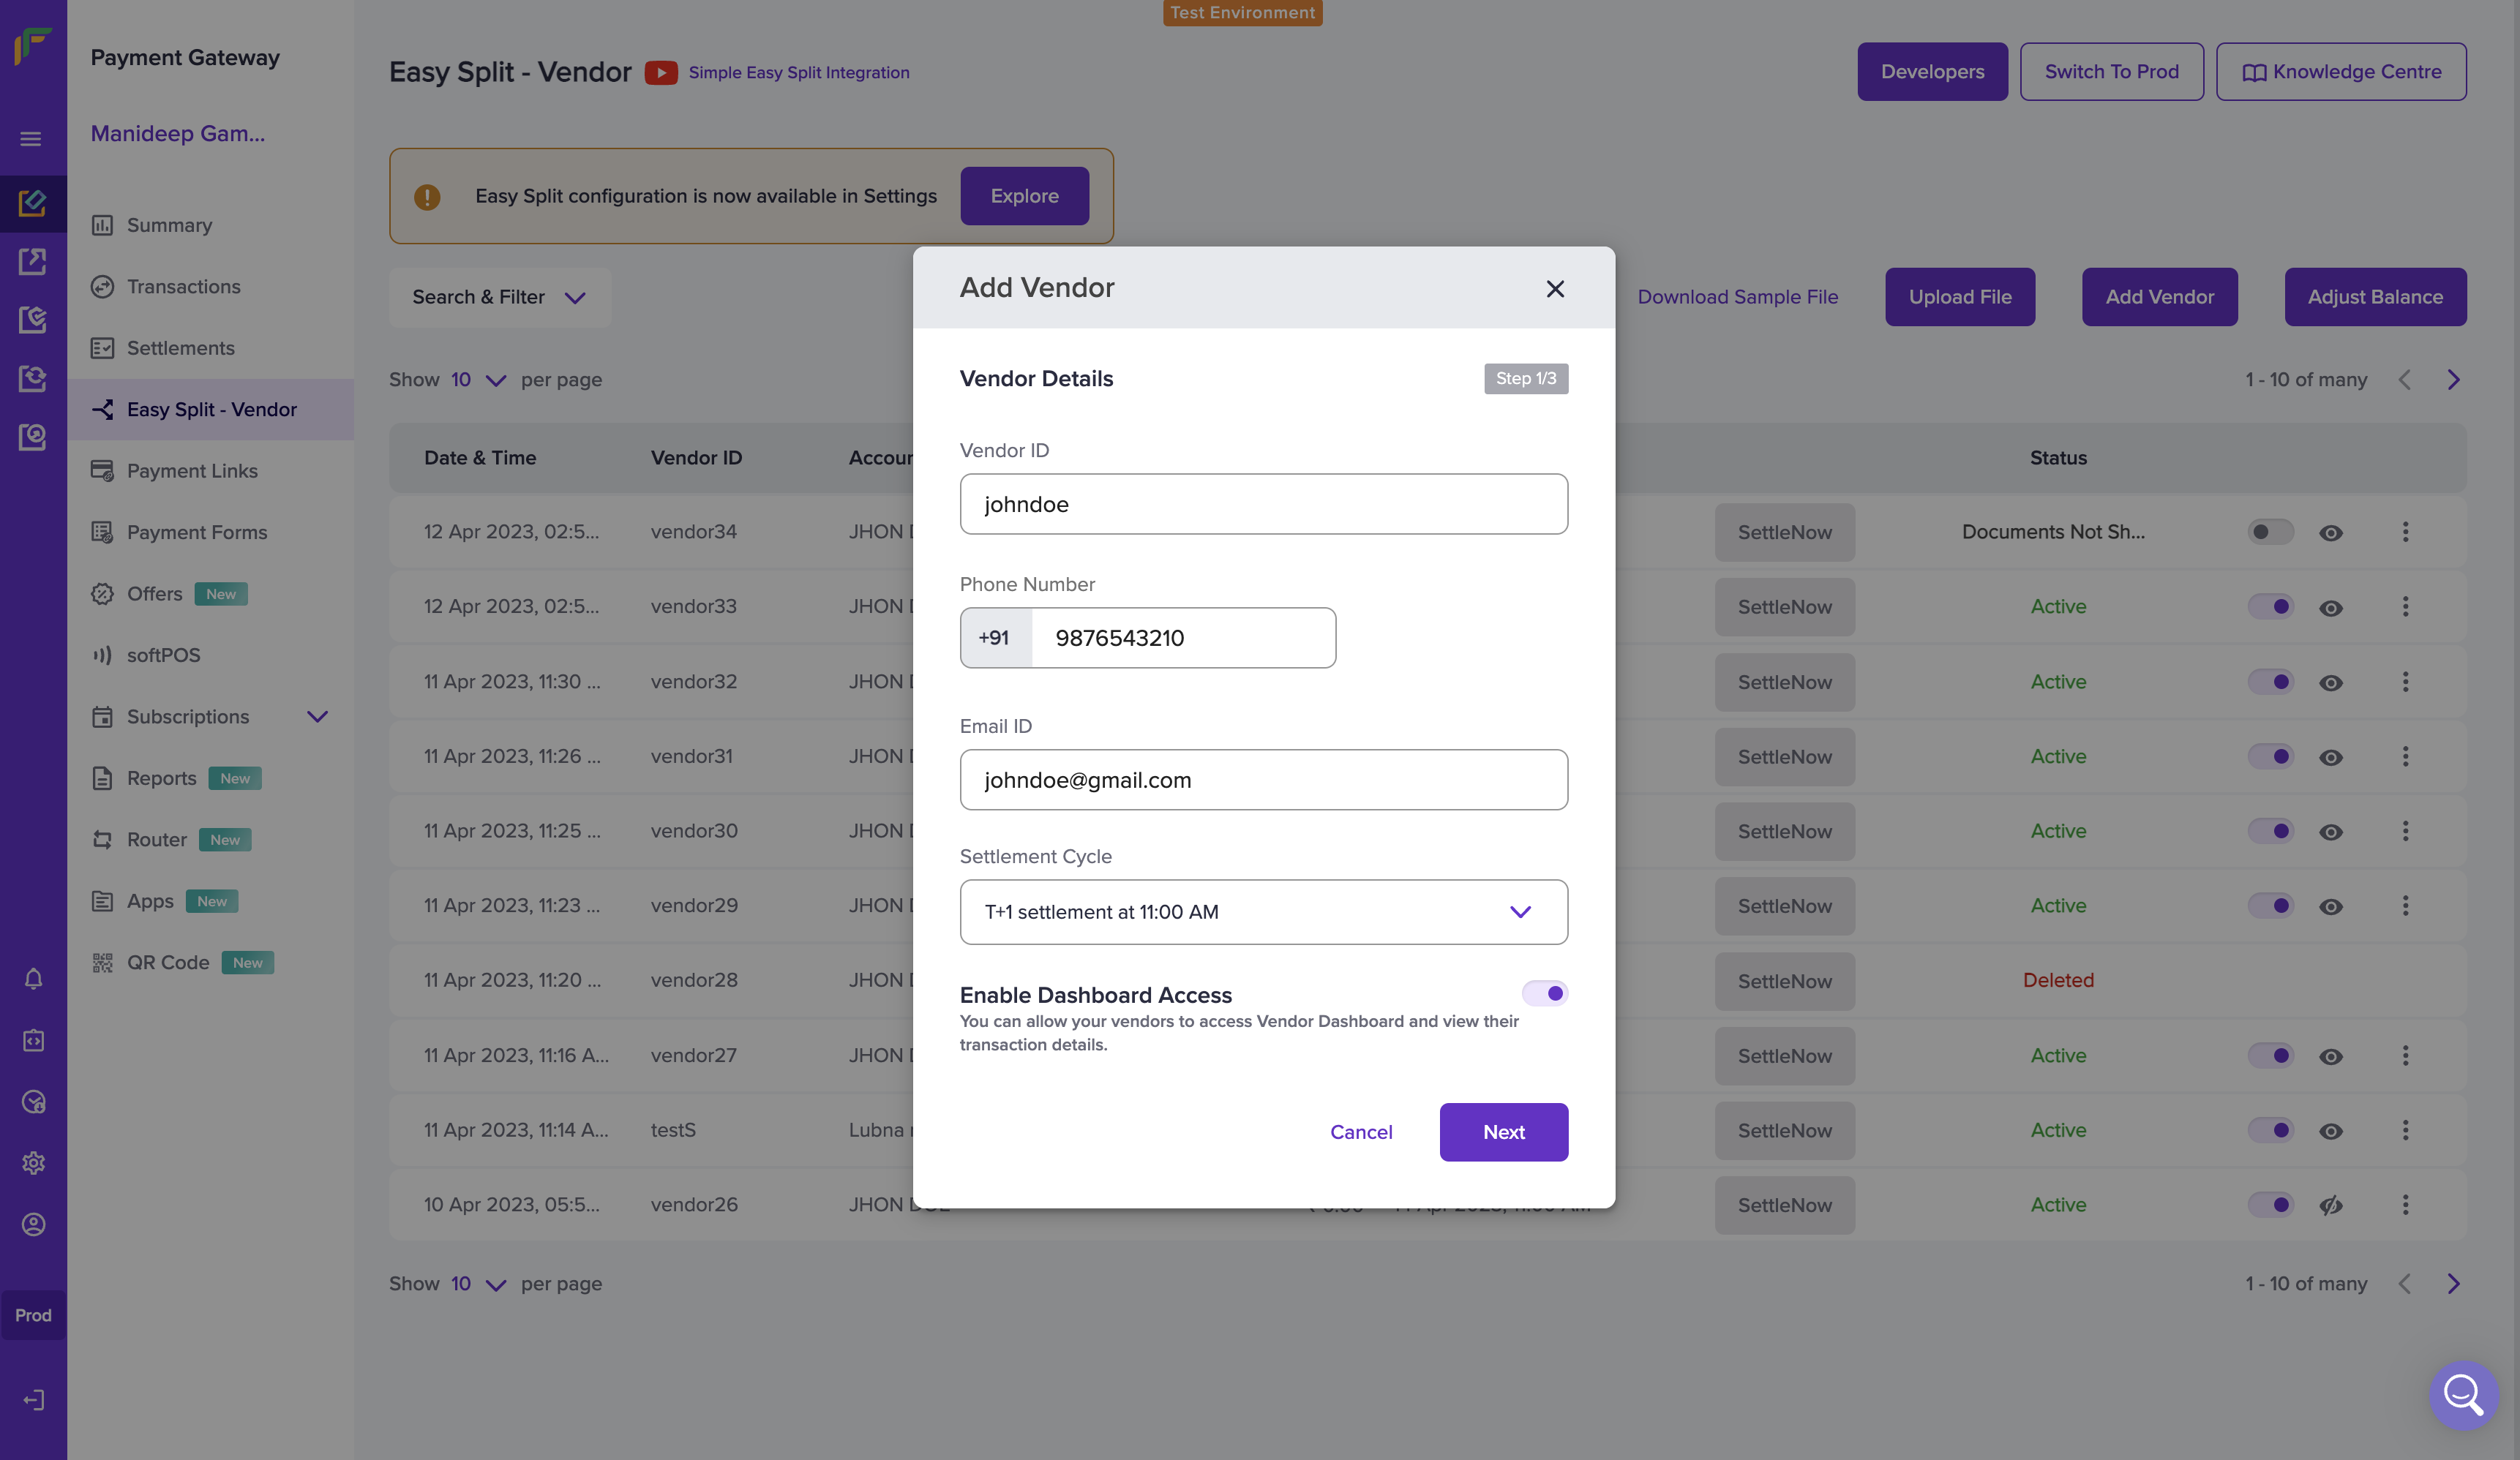
Enter the following details -
- Vendor ID - ID of the vendor.
- Phone Number - phone number of your vendor.
- Email ID - Email address of your vendor.
- Vendor Line of Business - Select your vendor’s line of business. Click here to know more.
- Vendor Business Type - Select the business type of your vendor. Click here to know more.
- Settlement Cycle - Select the schedule option through which you want to settle your vendors. Click here to know the available settlement cycles.
Once done, click Next.
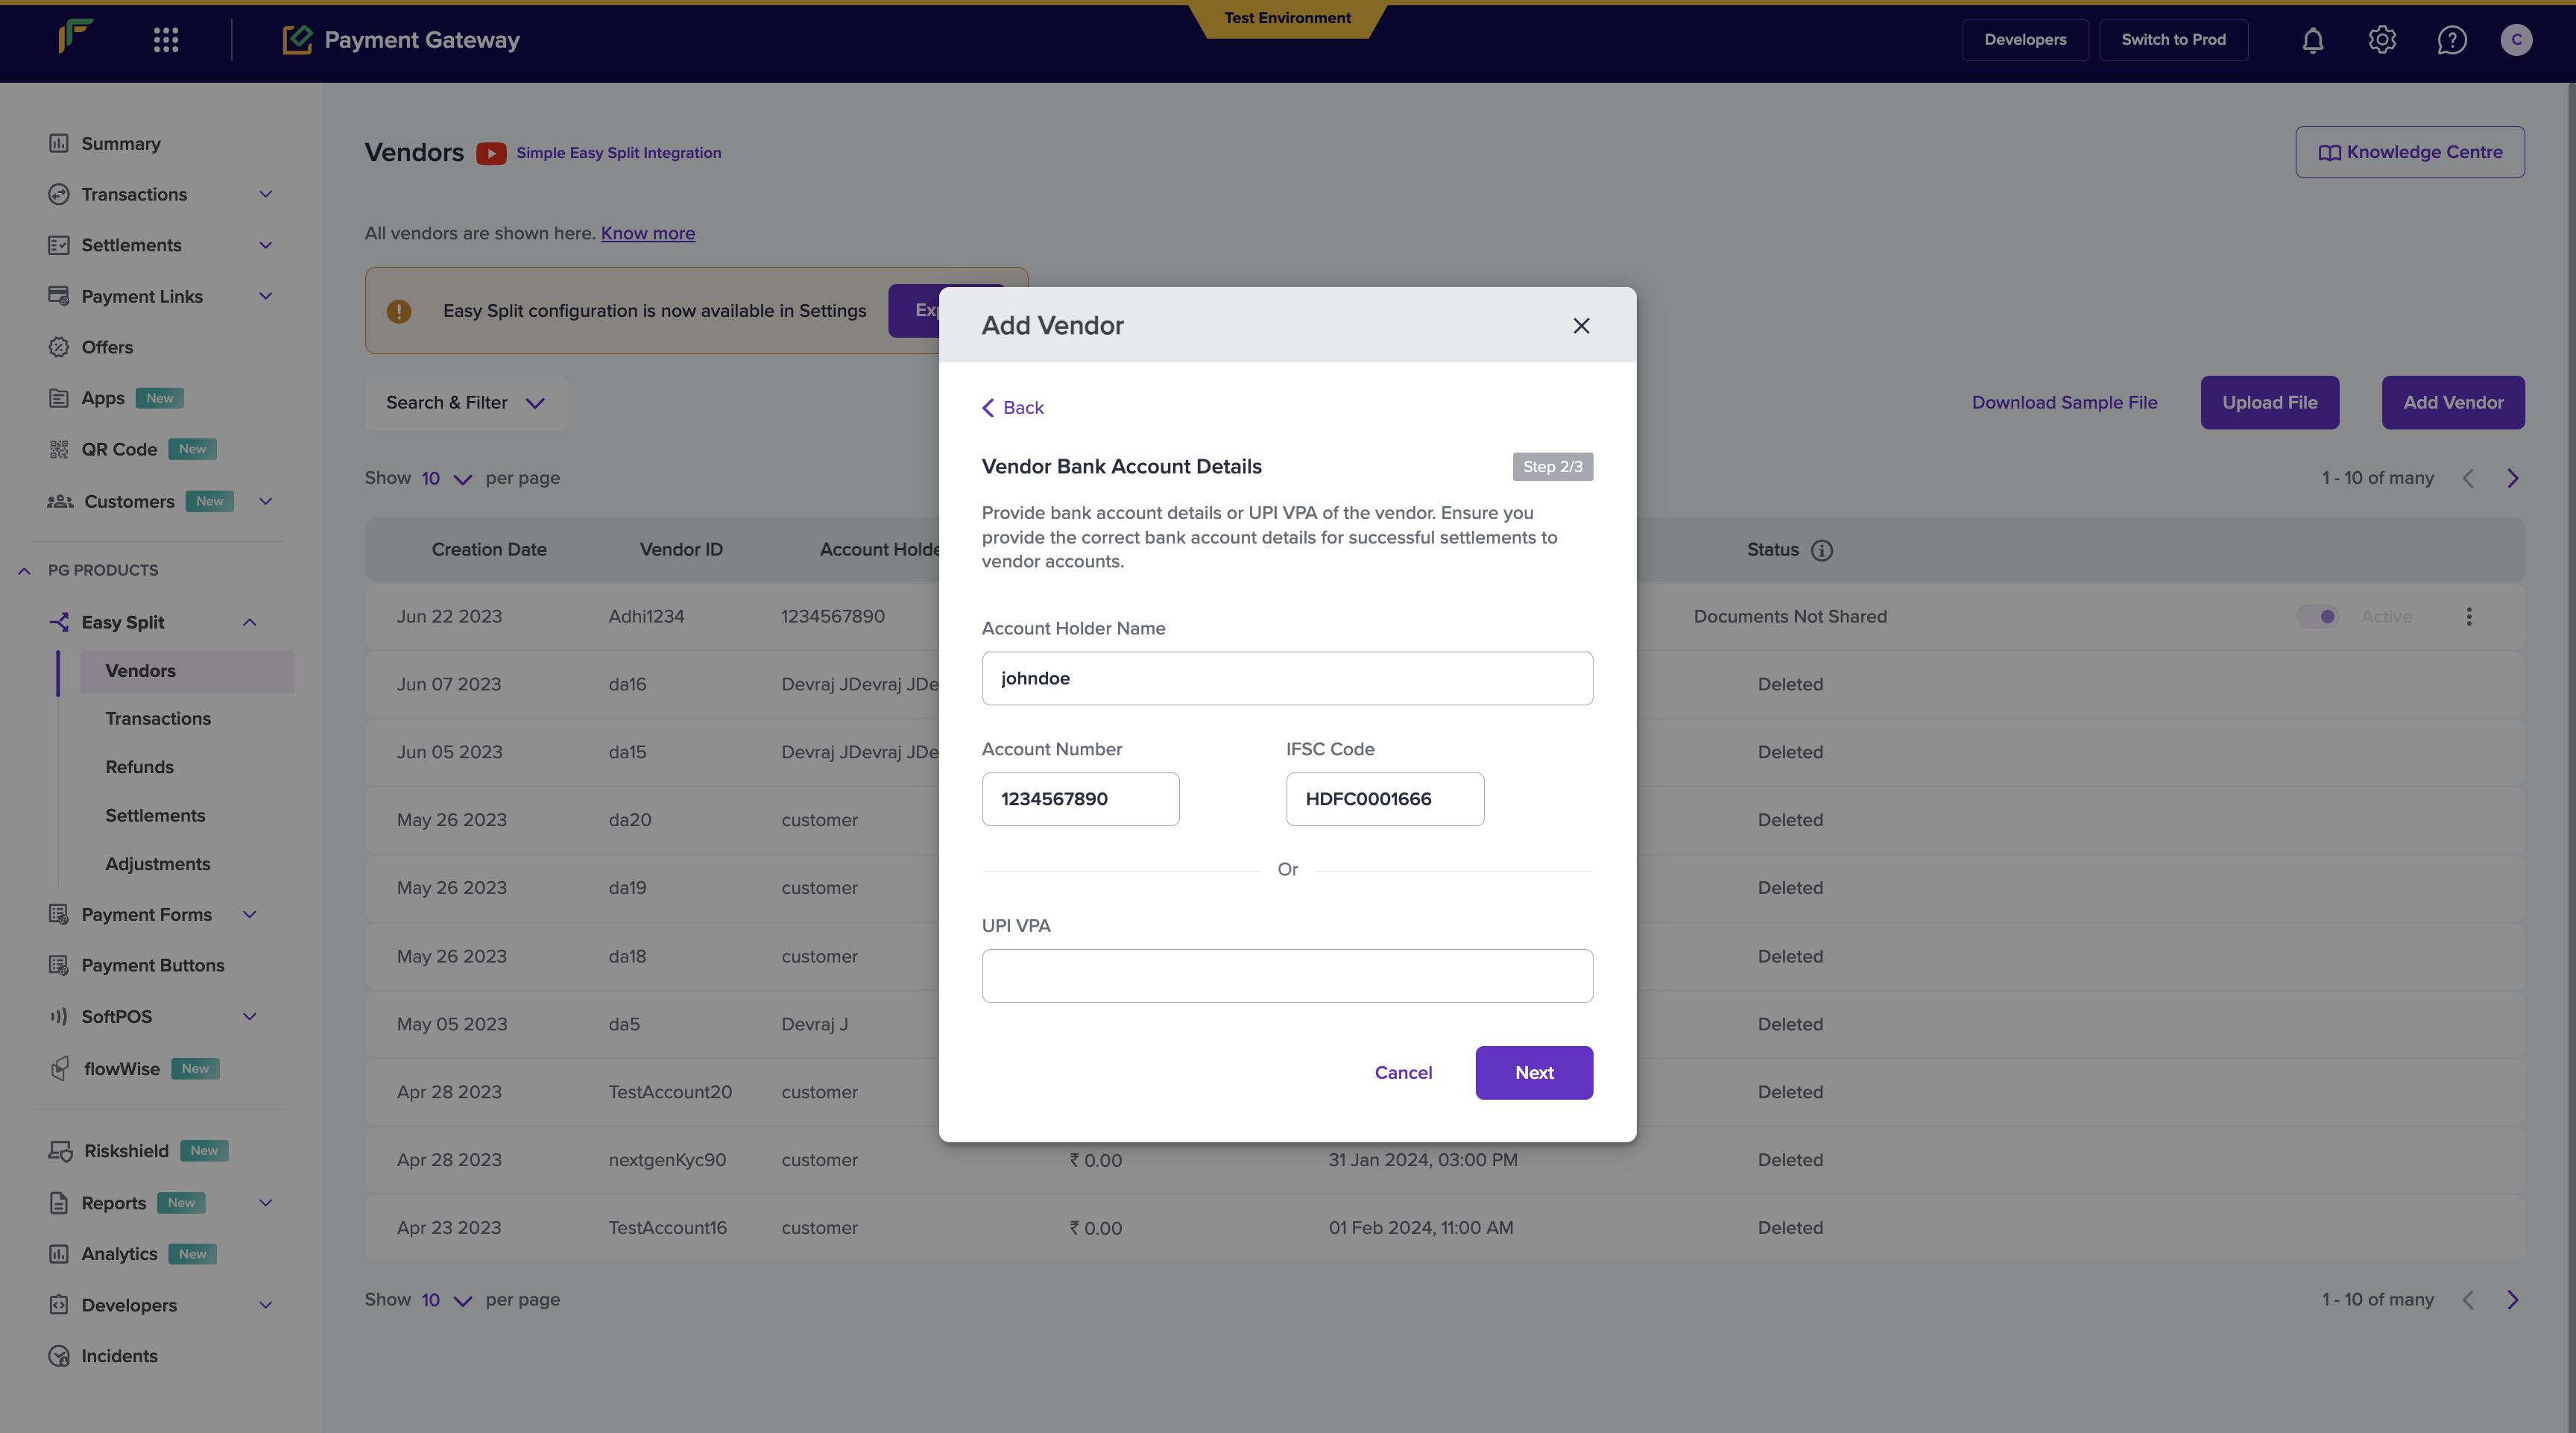
- Mention the Vendor Bank Account Details such as Account Holder Name, Account Number, and IFSC Code or UPI VPA to process payments to the vendor account.
Available Schedule Options
Use schedule option 8, 9, 14 or 17 to schedule instant settlements to your
vendor account.
- Select the Enable Dashboard Access option to allow your vendors to access the Vendor Dashboard. Click here to read more on Vendor Dashboard.
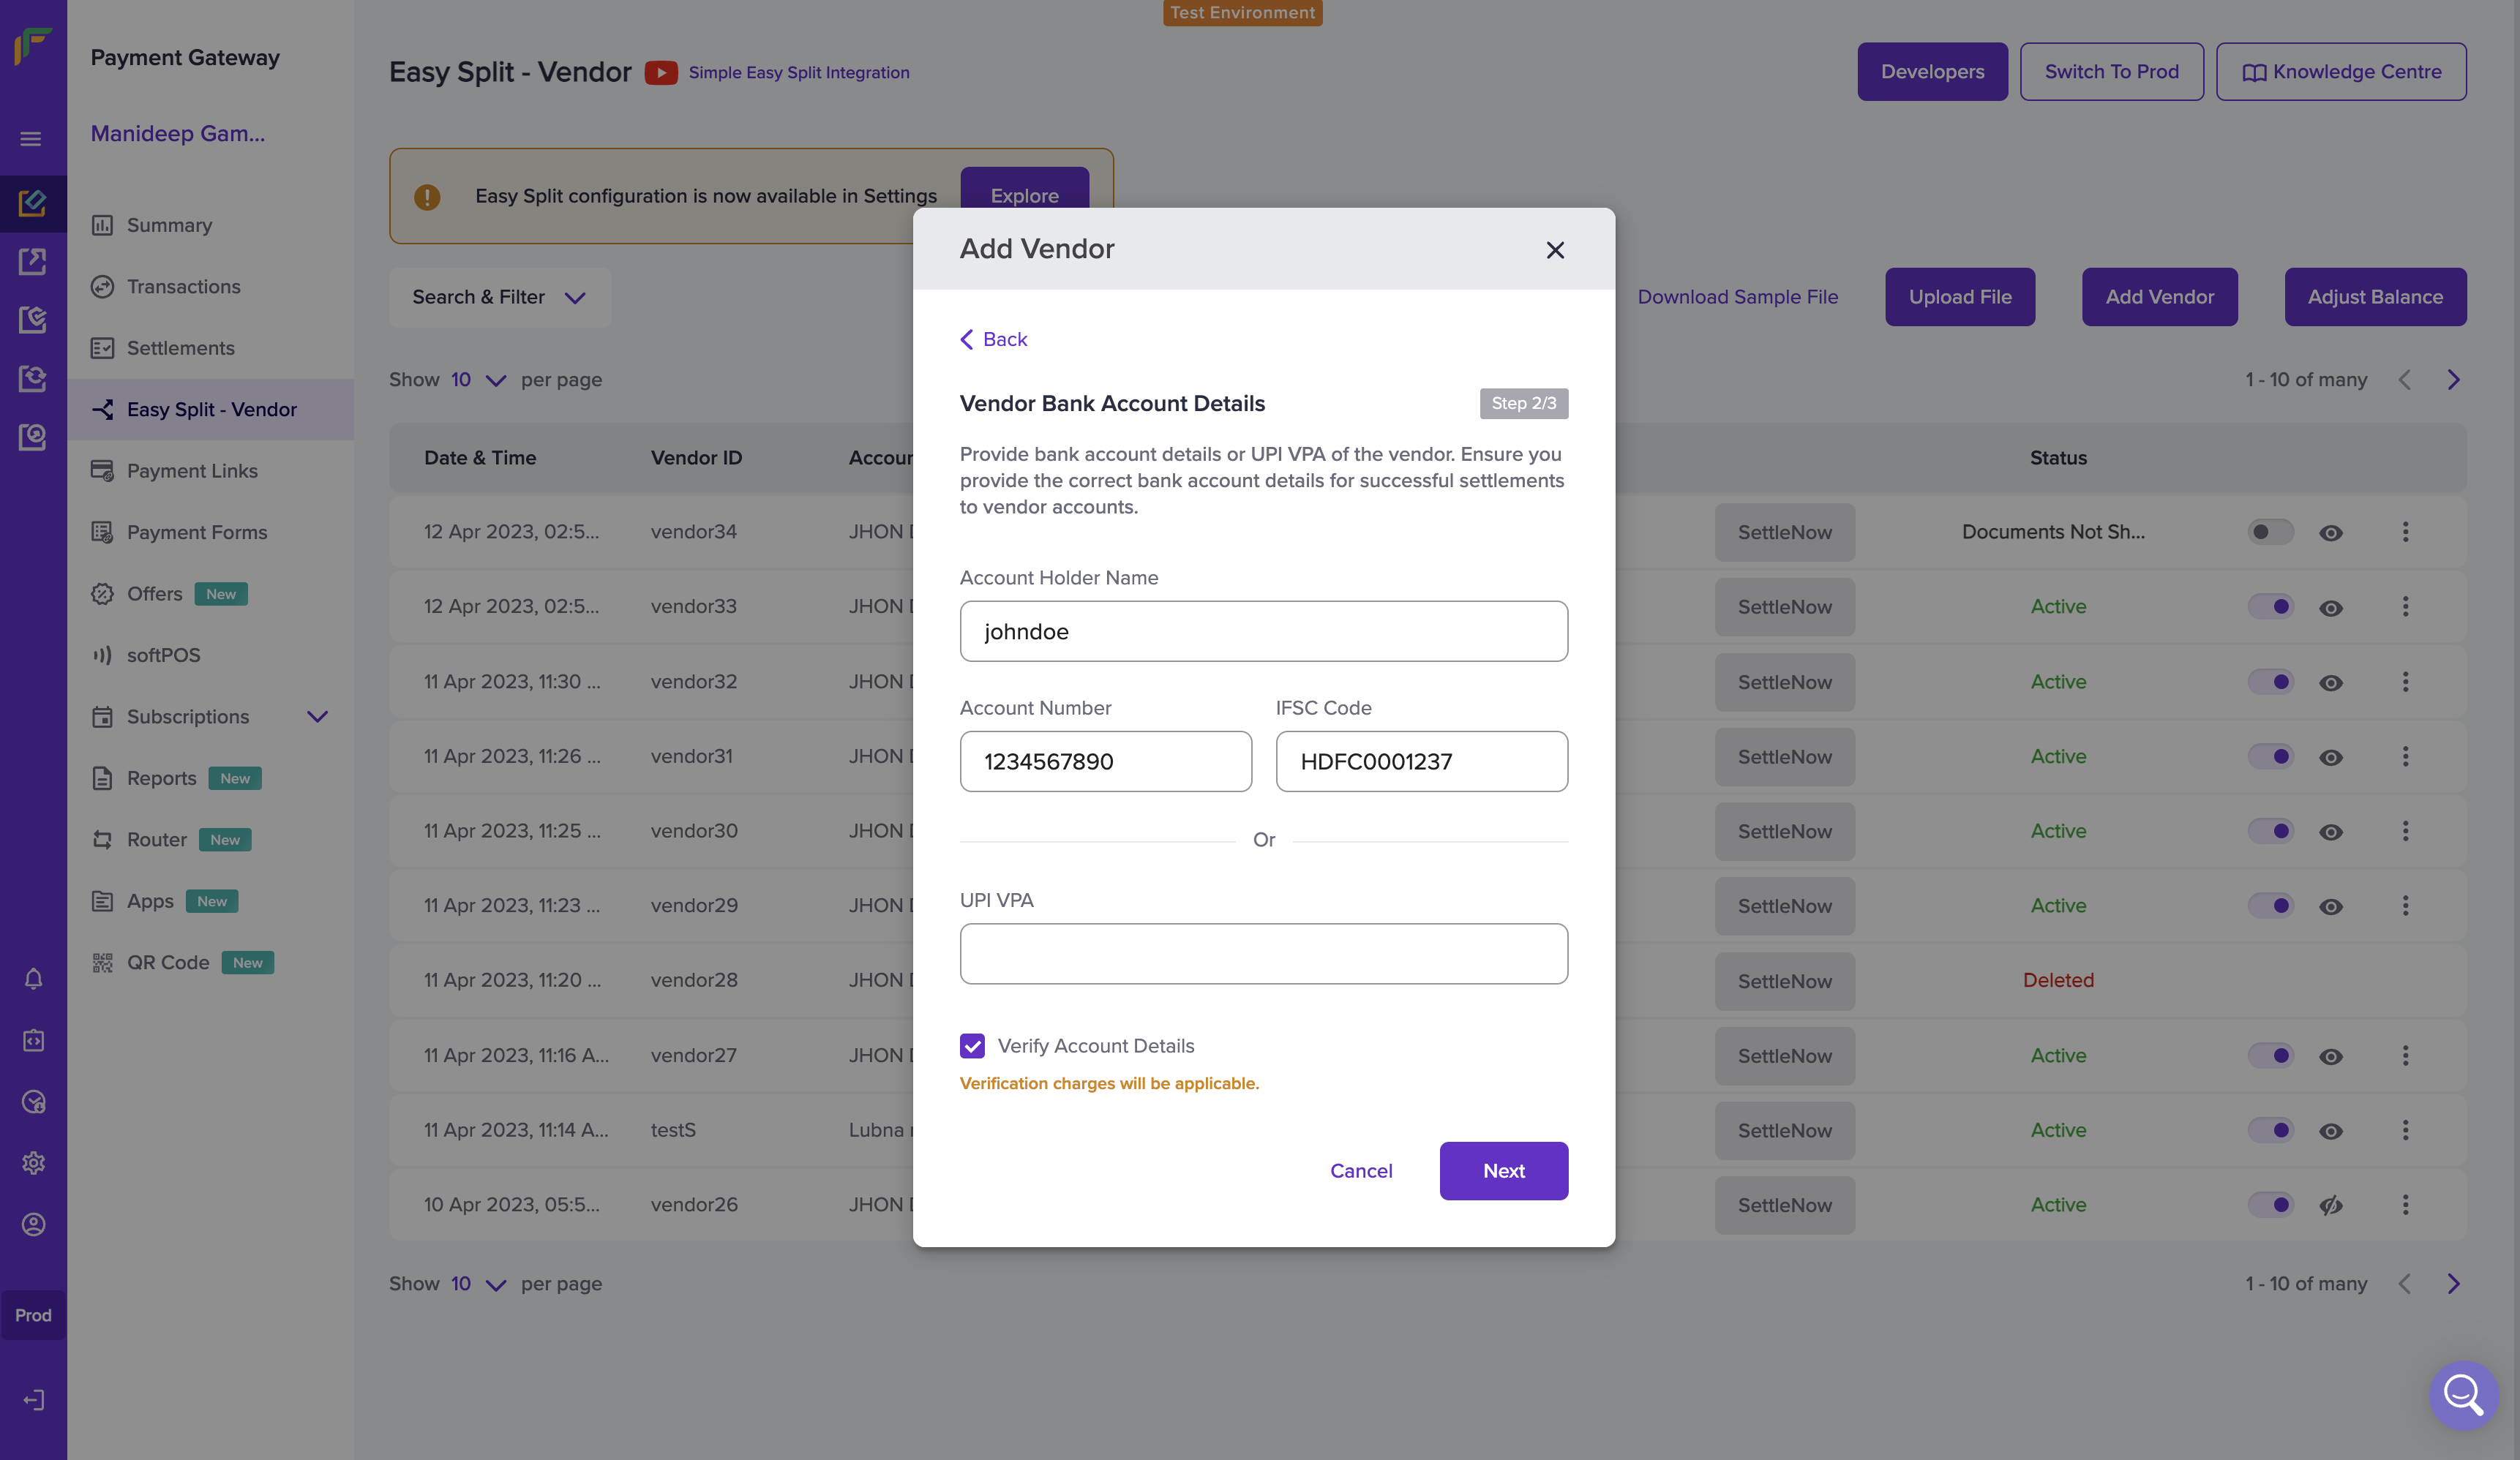
- Enter the vendor’s bank details like Account Holder Name, Account Number, IFSC Code or UPI VPA to process payments to the vendor account.
You can provide either the vendor bank or UPI details, both cannot be passed.
- Select the option Verify Account Details to verify the beneficiary bank account details or the UPI VPA. This ensures that the correct details are available and will help make successful settlements for the vendor.
You will be charged to verify bank accounts and to verify UPI VPA details.
Make sure you have sufficient balance, or proceed without account
verification.
- Provide the vendor KYC details. Select the vendor type - Business or Individual. Select Individual type if your vendor’s annual turnover is 20 lakhs or lesser. Select Business Entity if your vendor’s annual turnover is more than 20 lakhs.
- Select the Business Type from the drop-down list. Provide your vendor’s Business PAN and upload the same. You will be required to provide other details of your vendors based on the vendor type.
- PAN
- Address Proof (Aadhaar, Driving License, Voter ID, Passport)
- Aadhaar Number
- NBFC Certificate
- Business PAN
- GST Number
- GST Certificate
- CIN Number
- CIN Certificate
- NBFC Certificate
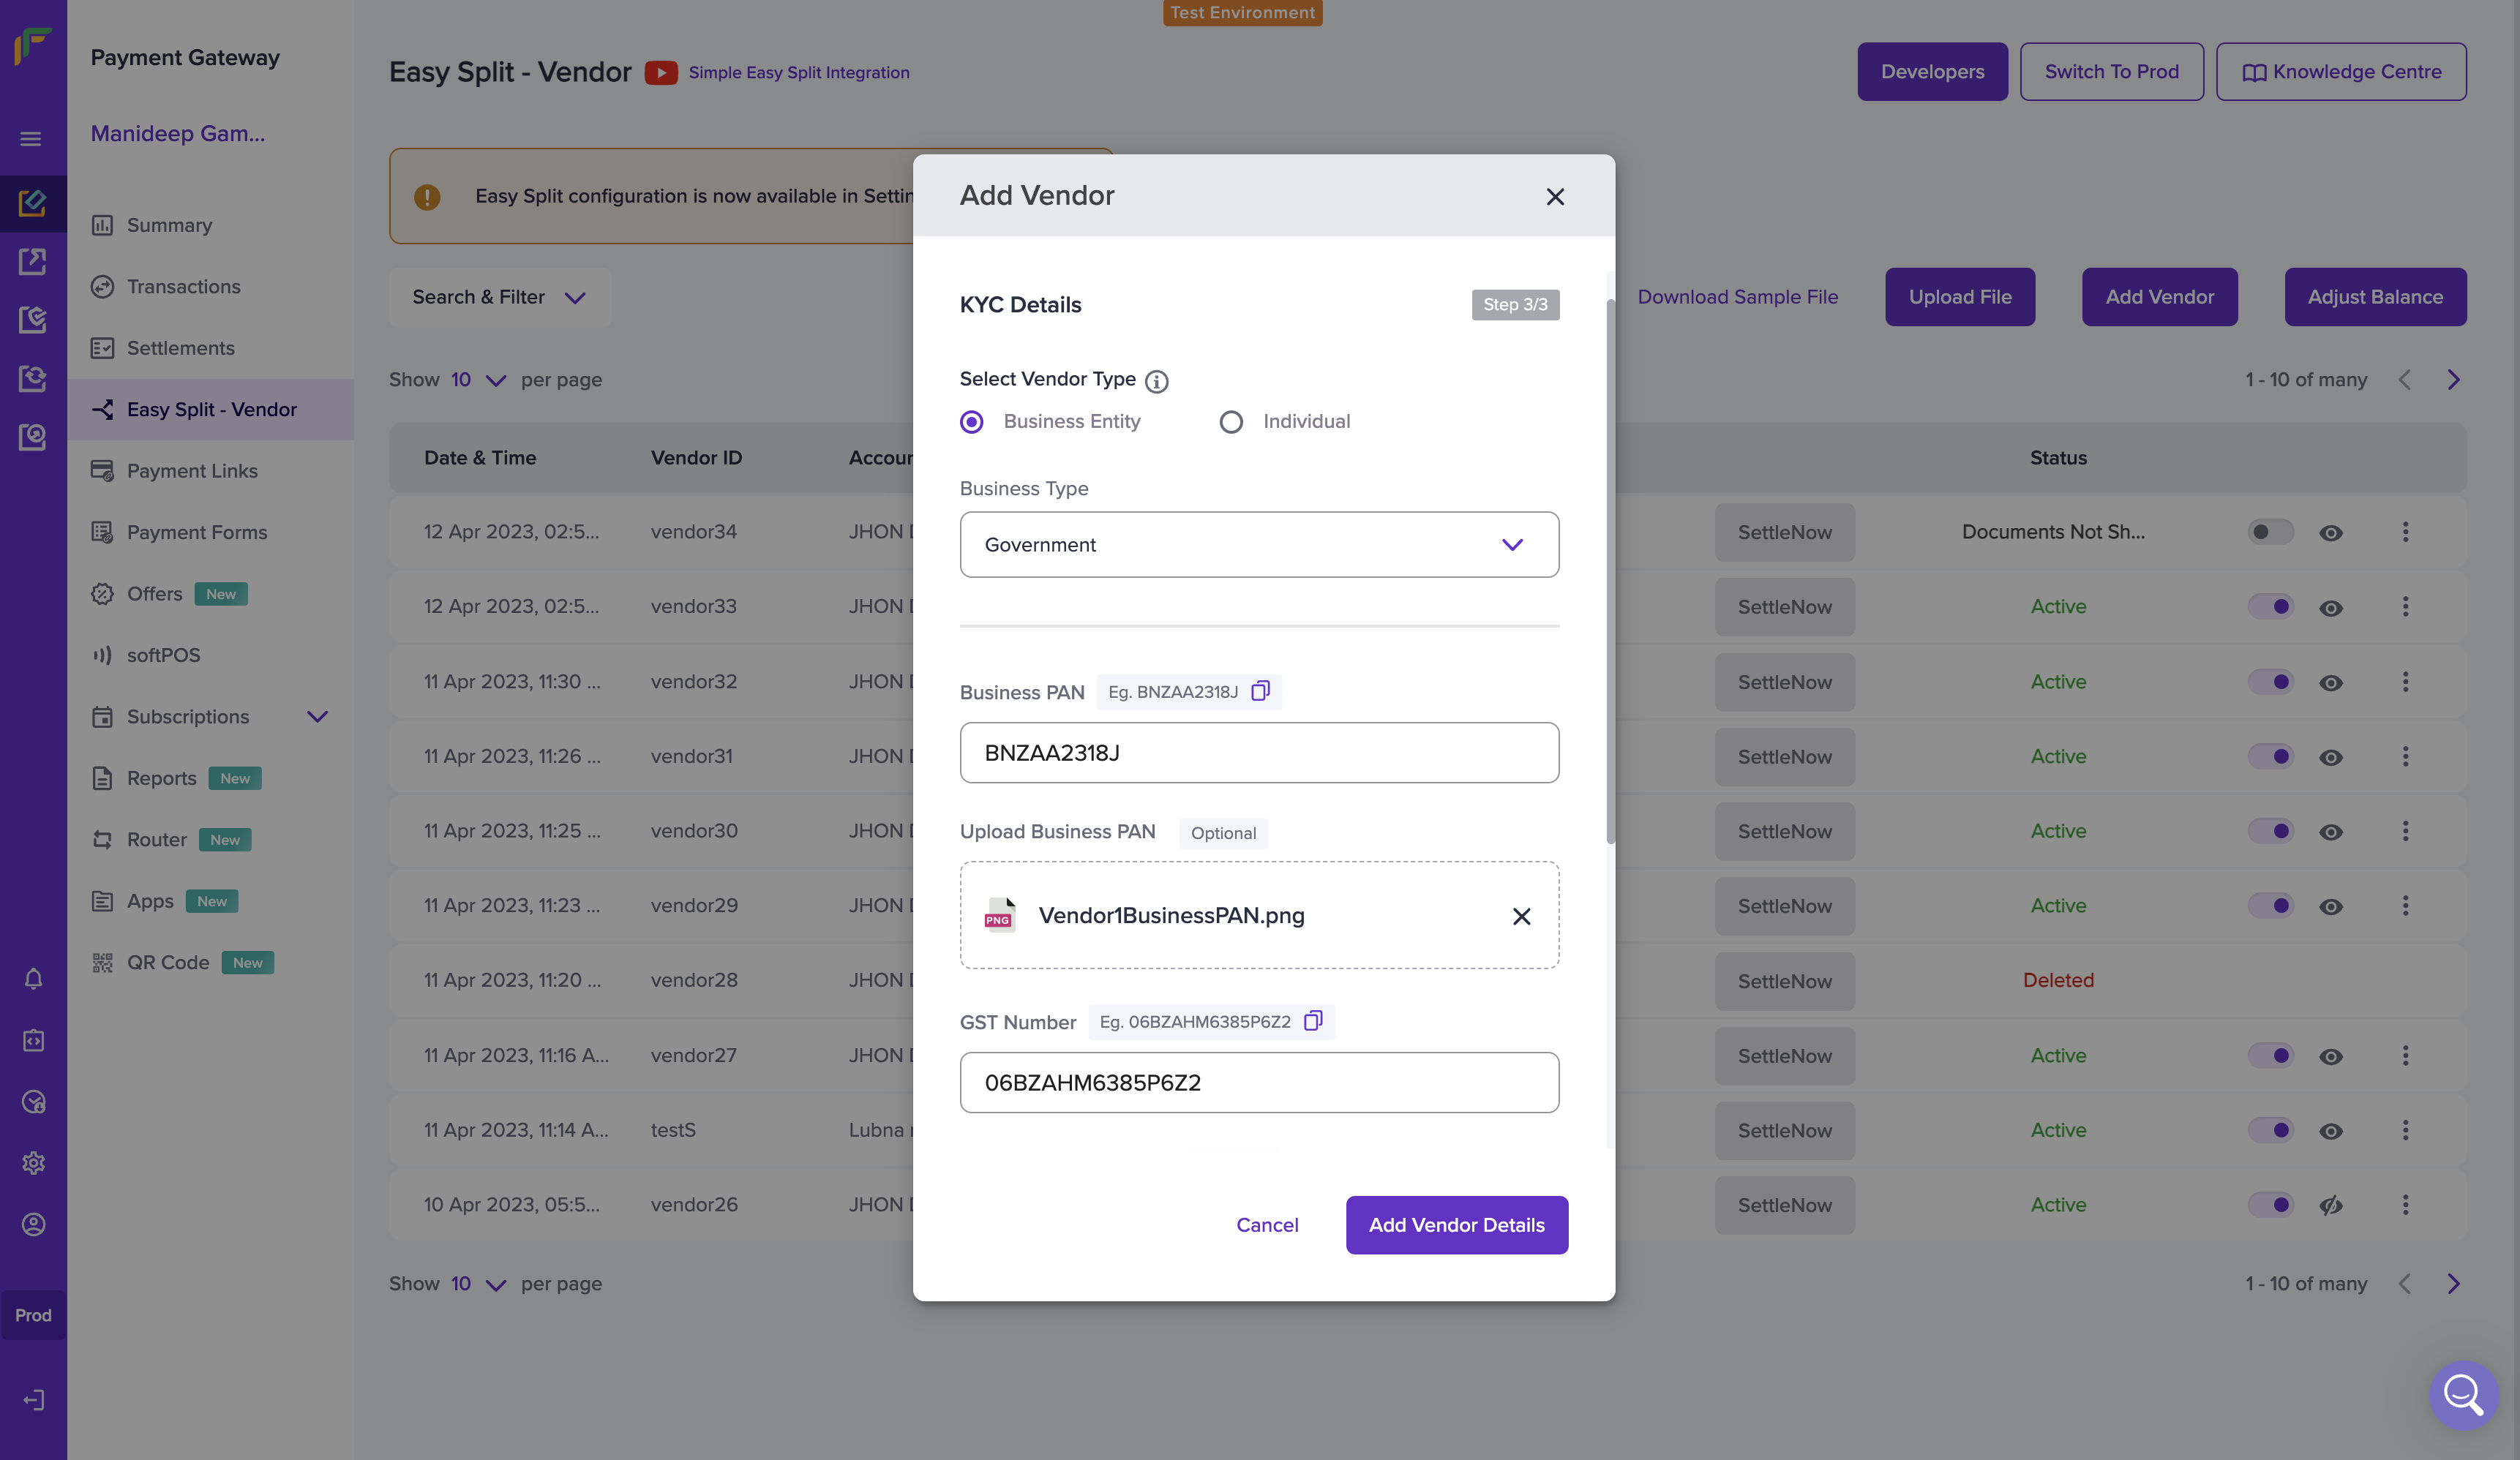
- Once done, click on Add Vendor Details. The vendor is added successfully. Vendor details are saved and can be used to process payments. The vendor details will be shown in the Easy Split - Vendor screen.
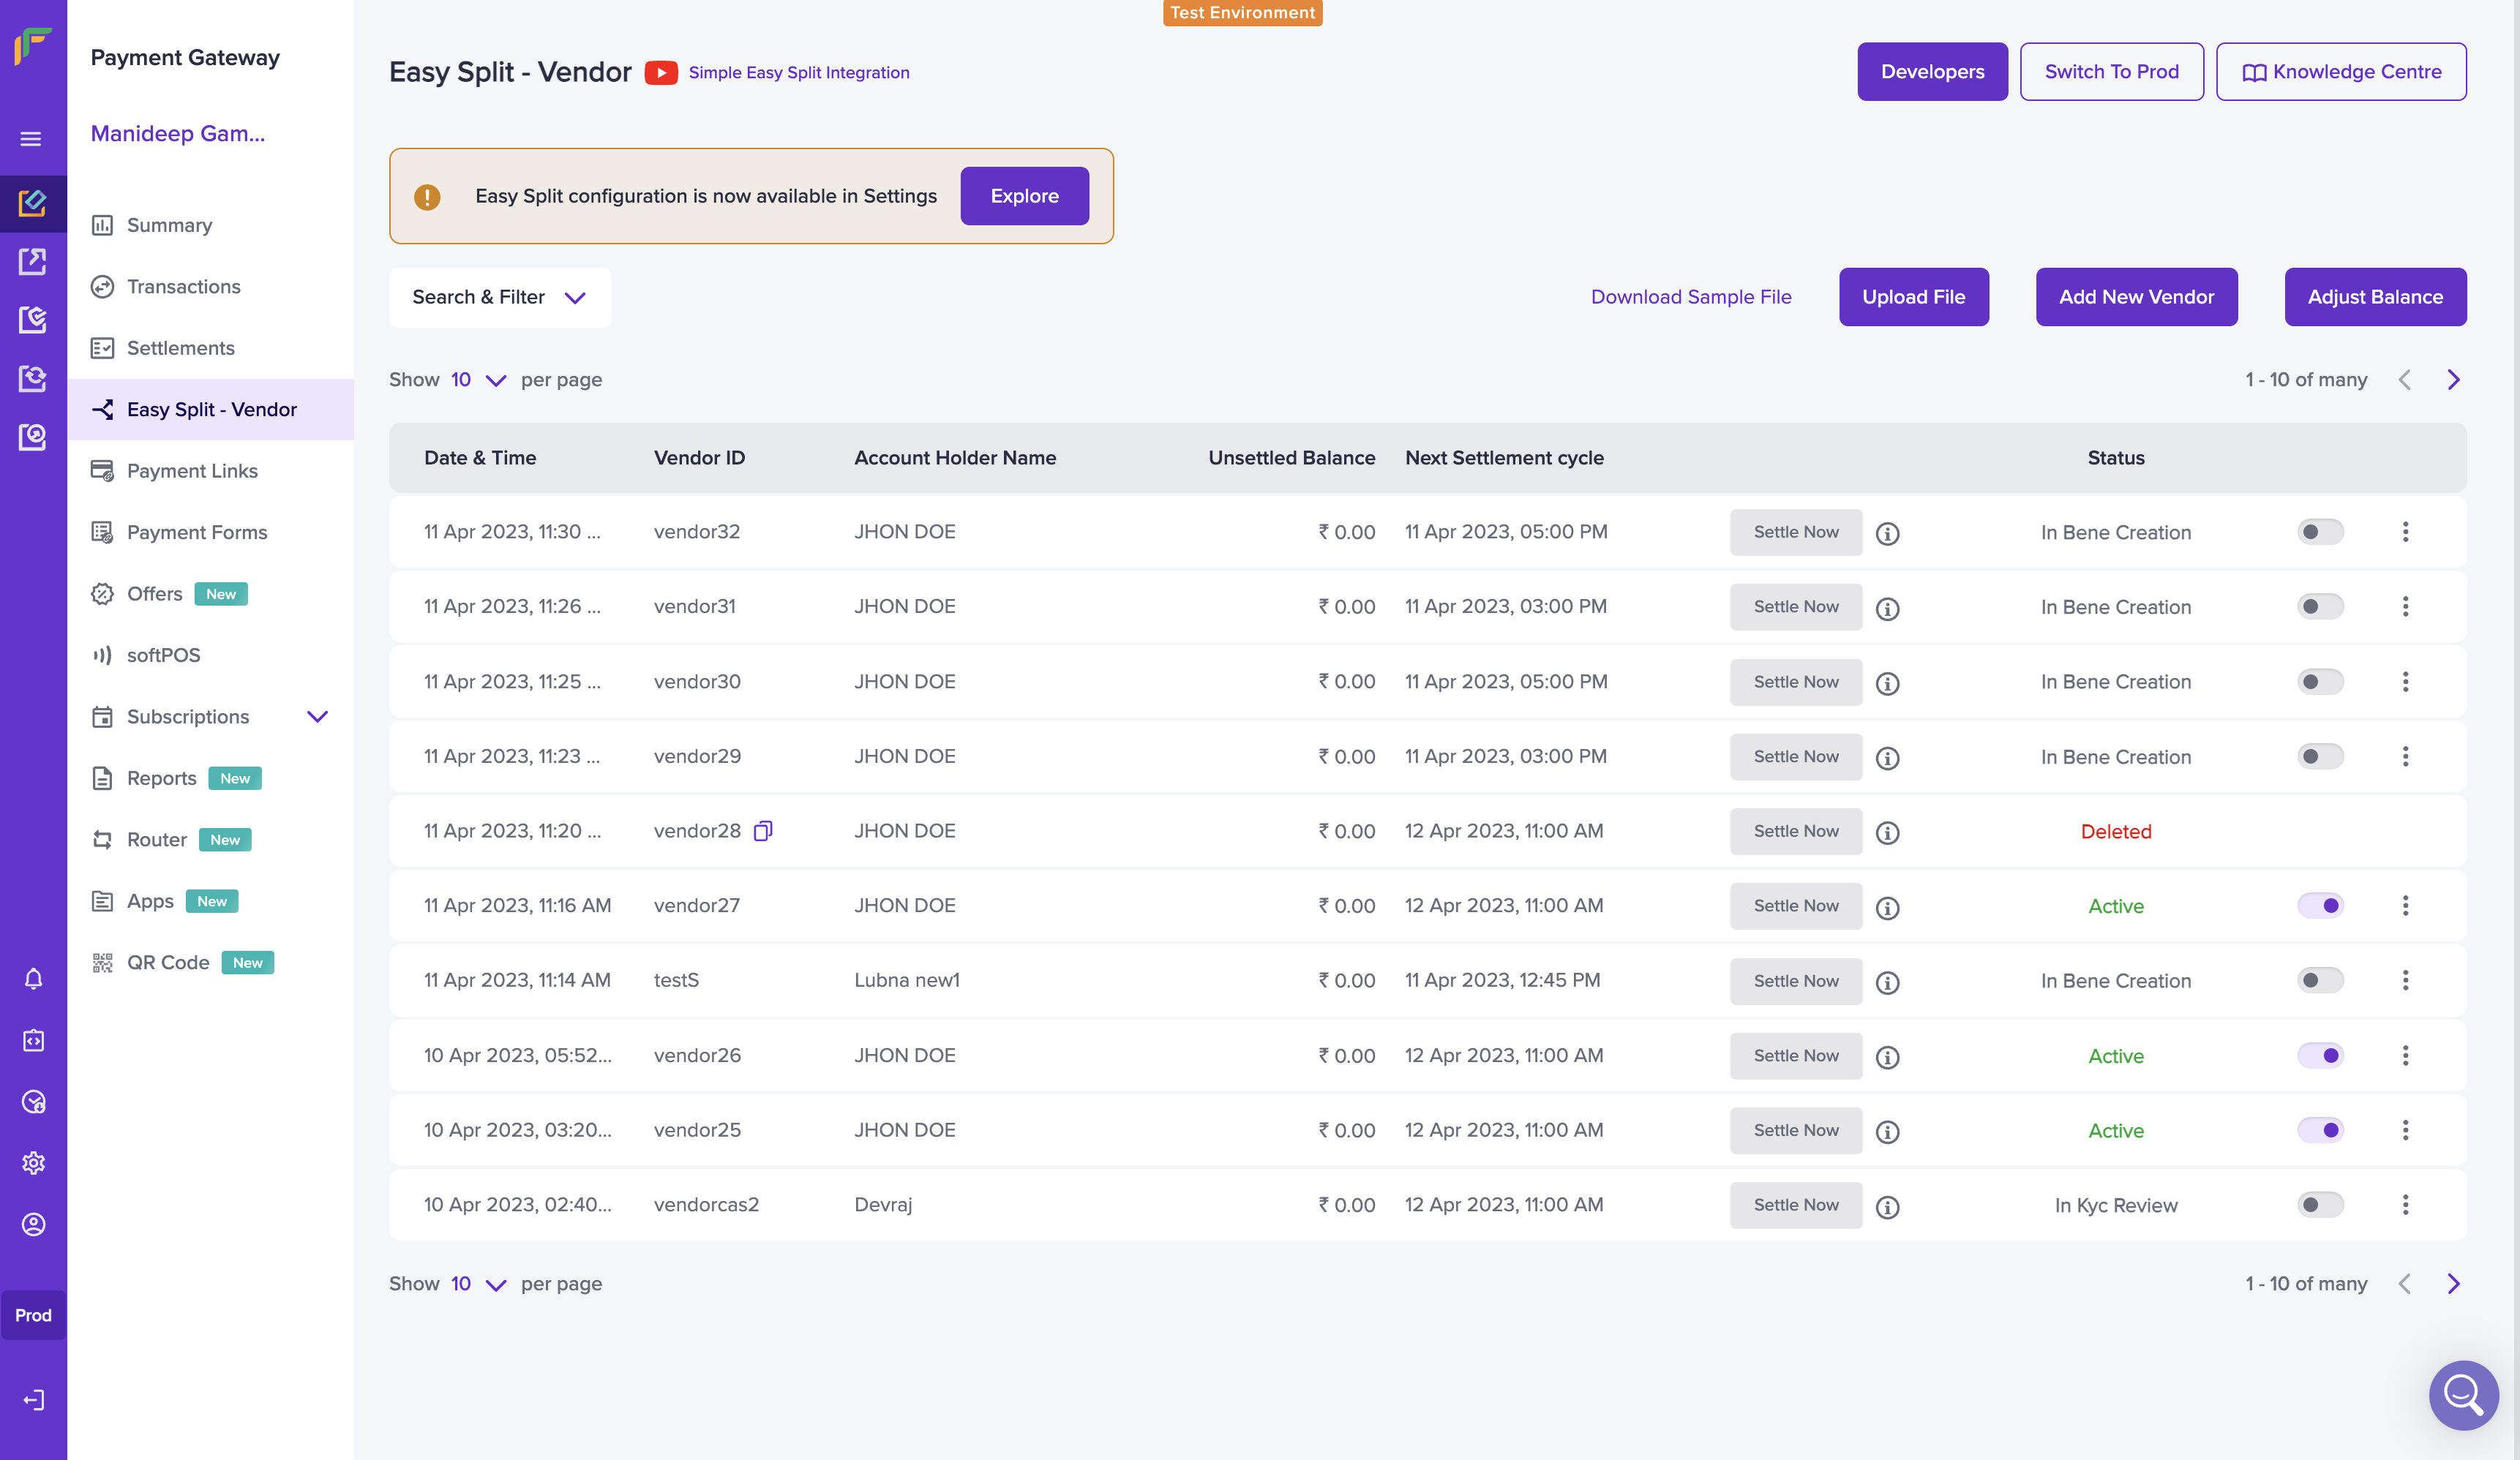
Vendor Status
Once you have added a vendor, it will go through various stages. They are mentioned in the table below.
Watch this video to learn how to add vendors via the merchant dashboard.
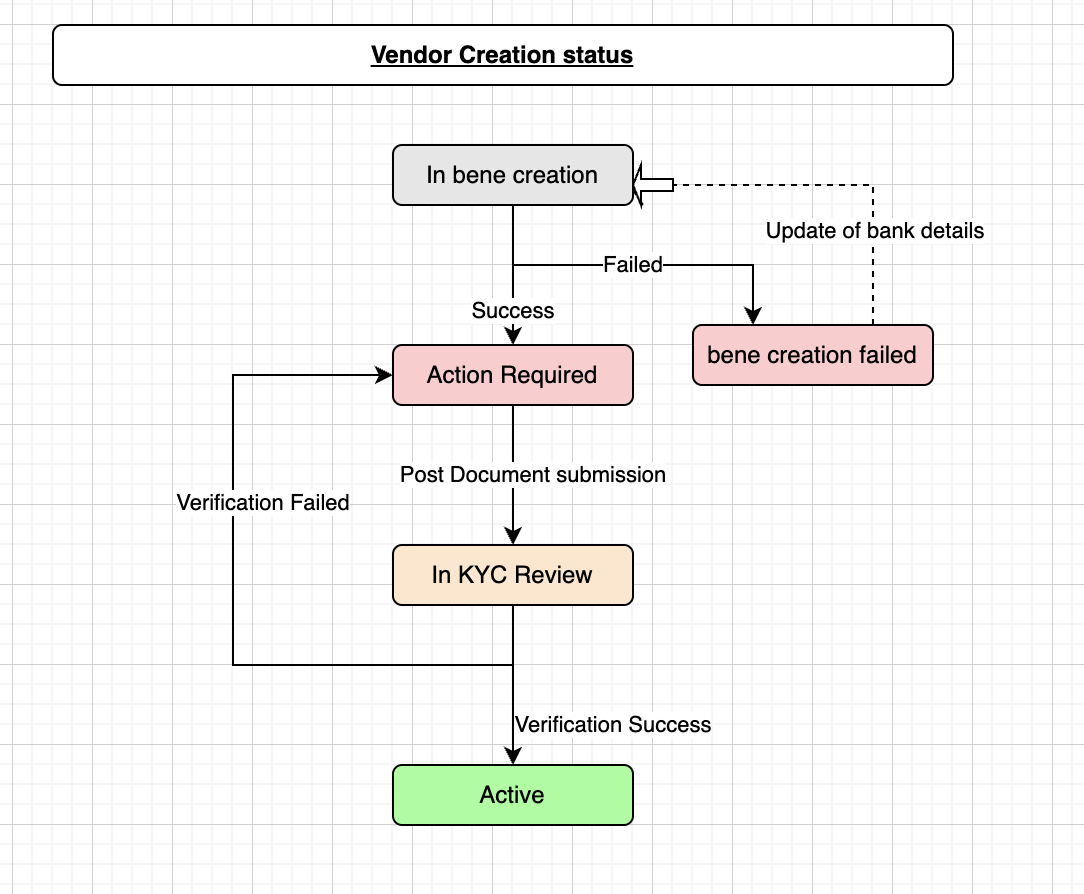
Vendor Status Workflow
When you onboard a vendor from the dashboard or use our APIs, they go through various states. They are explained in the section below. The various vendor status during the onboarding process is mentioned in the table below.
The image below shows the vendor onboarding flow:
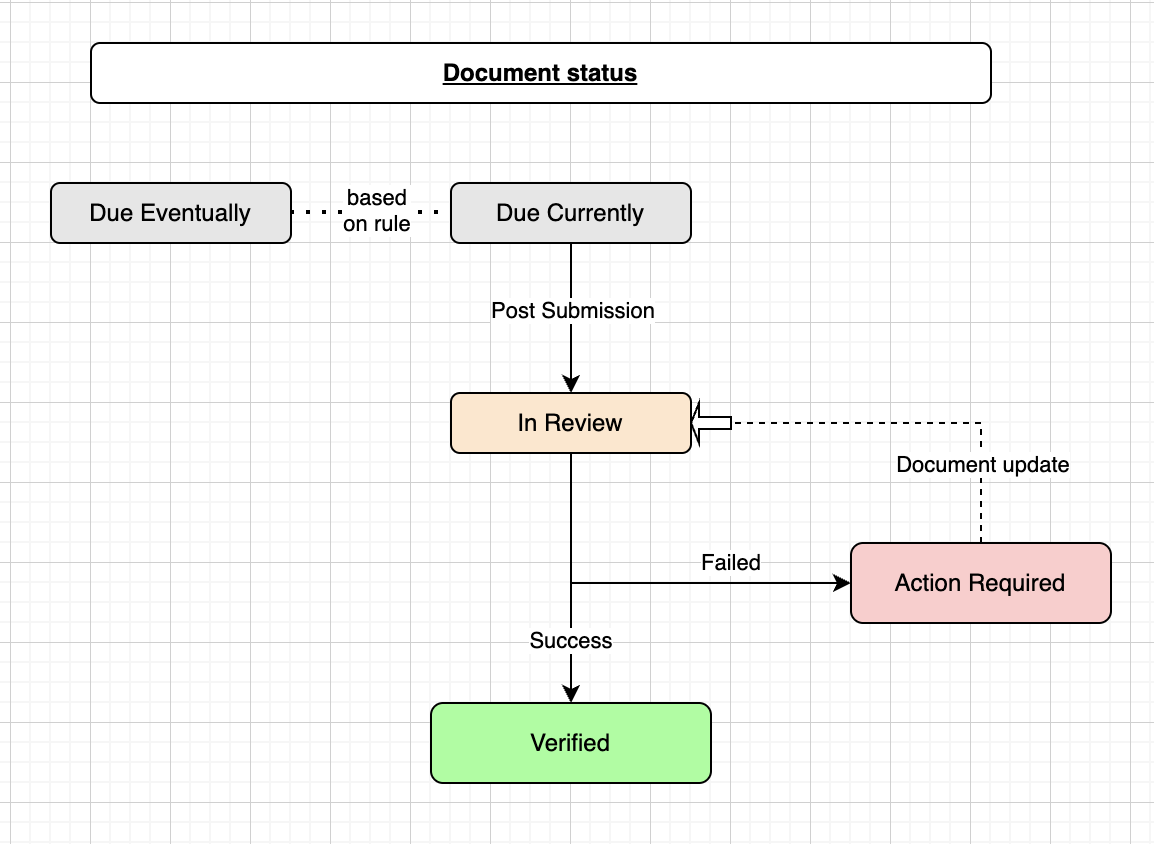
Document Status Workflow
The various states a document goes through during the verification process is mentioned in the table below:
The image below shows the document status workflow.
KYC Document Requirement
Before you begin adding vendors, you must know the documents that are required based on the merchant type and vendor type. Please find below the required document basis limit.List of Vendor Line of Business (LOB)
Vendor LOB
Vendor LOB
Vendor LOB Specific Documents
NBFC
NBFC
If vendor type is NBFC, then there are additional documents required:
- CIN
- NBFC and LSP Agreement
- NBFC Certificate
- NBFC domain confirmation email on Cashfree partnership
Adding Multiple Vendors
Use the Batch Upload feature to add a large number of vendors at a time. Add all the required details in a single file as per the required format and upload the file. Download the sample file to know what details are required to be filled in the batch file. To upload a batch file,- Go to Payment Gateway Dashboard > EasySplit - Vendor > click Upload File.
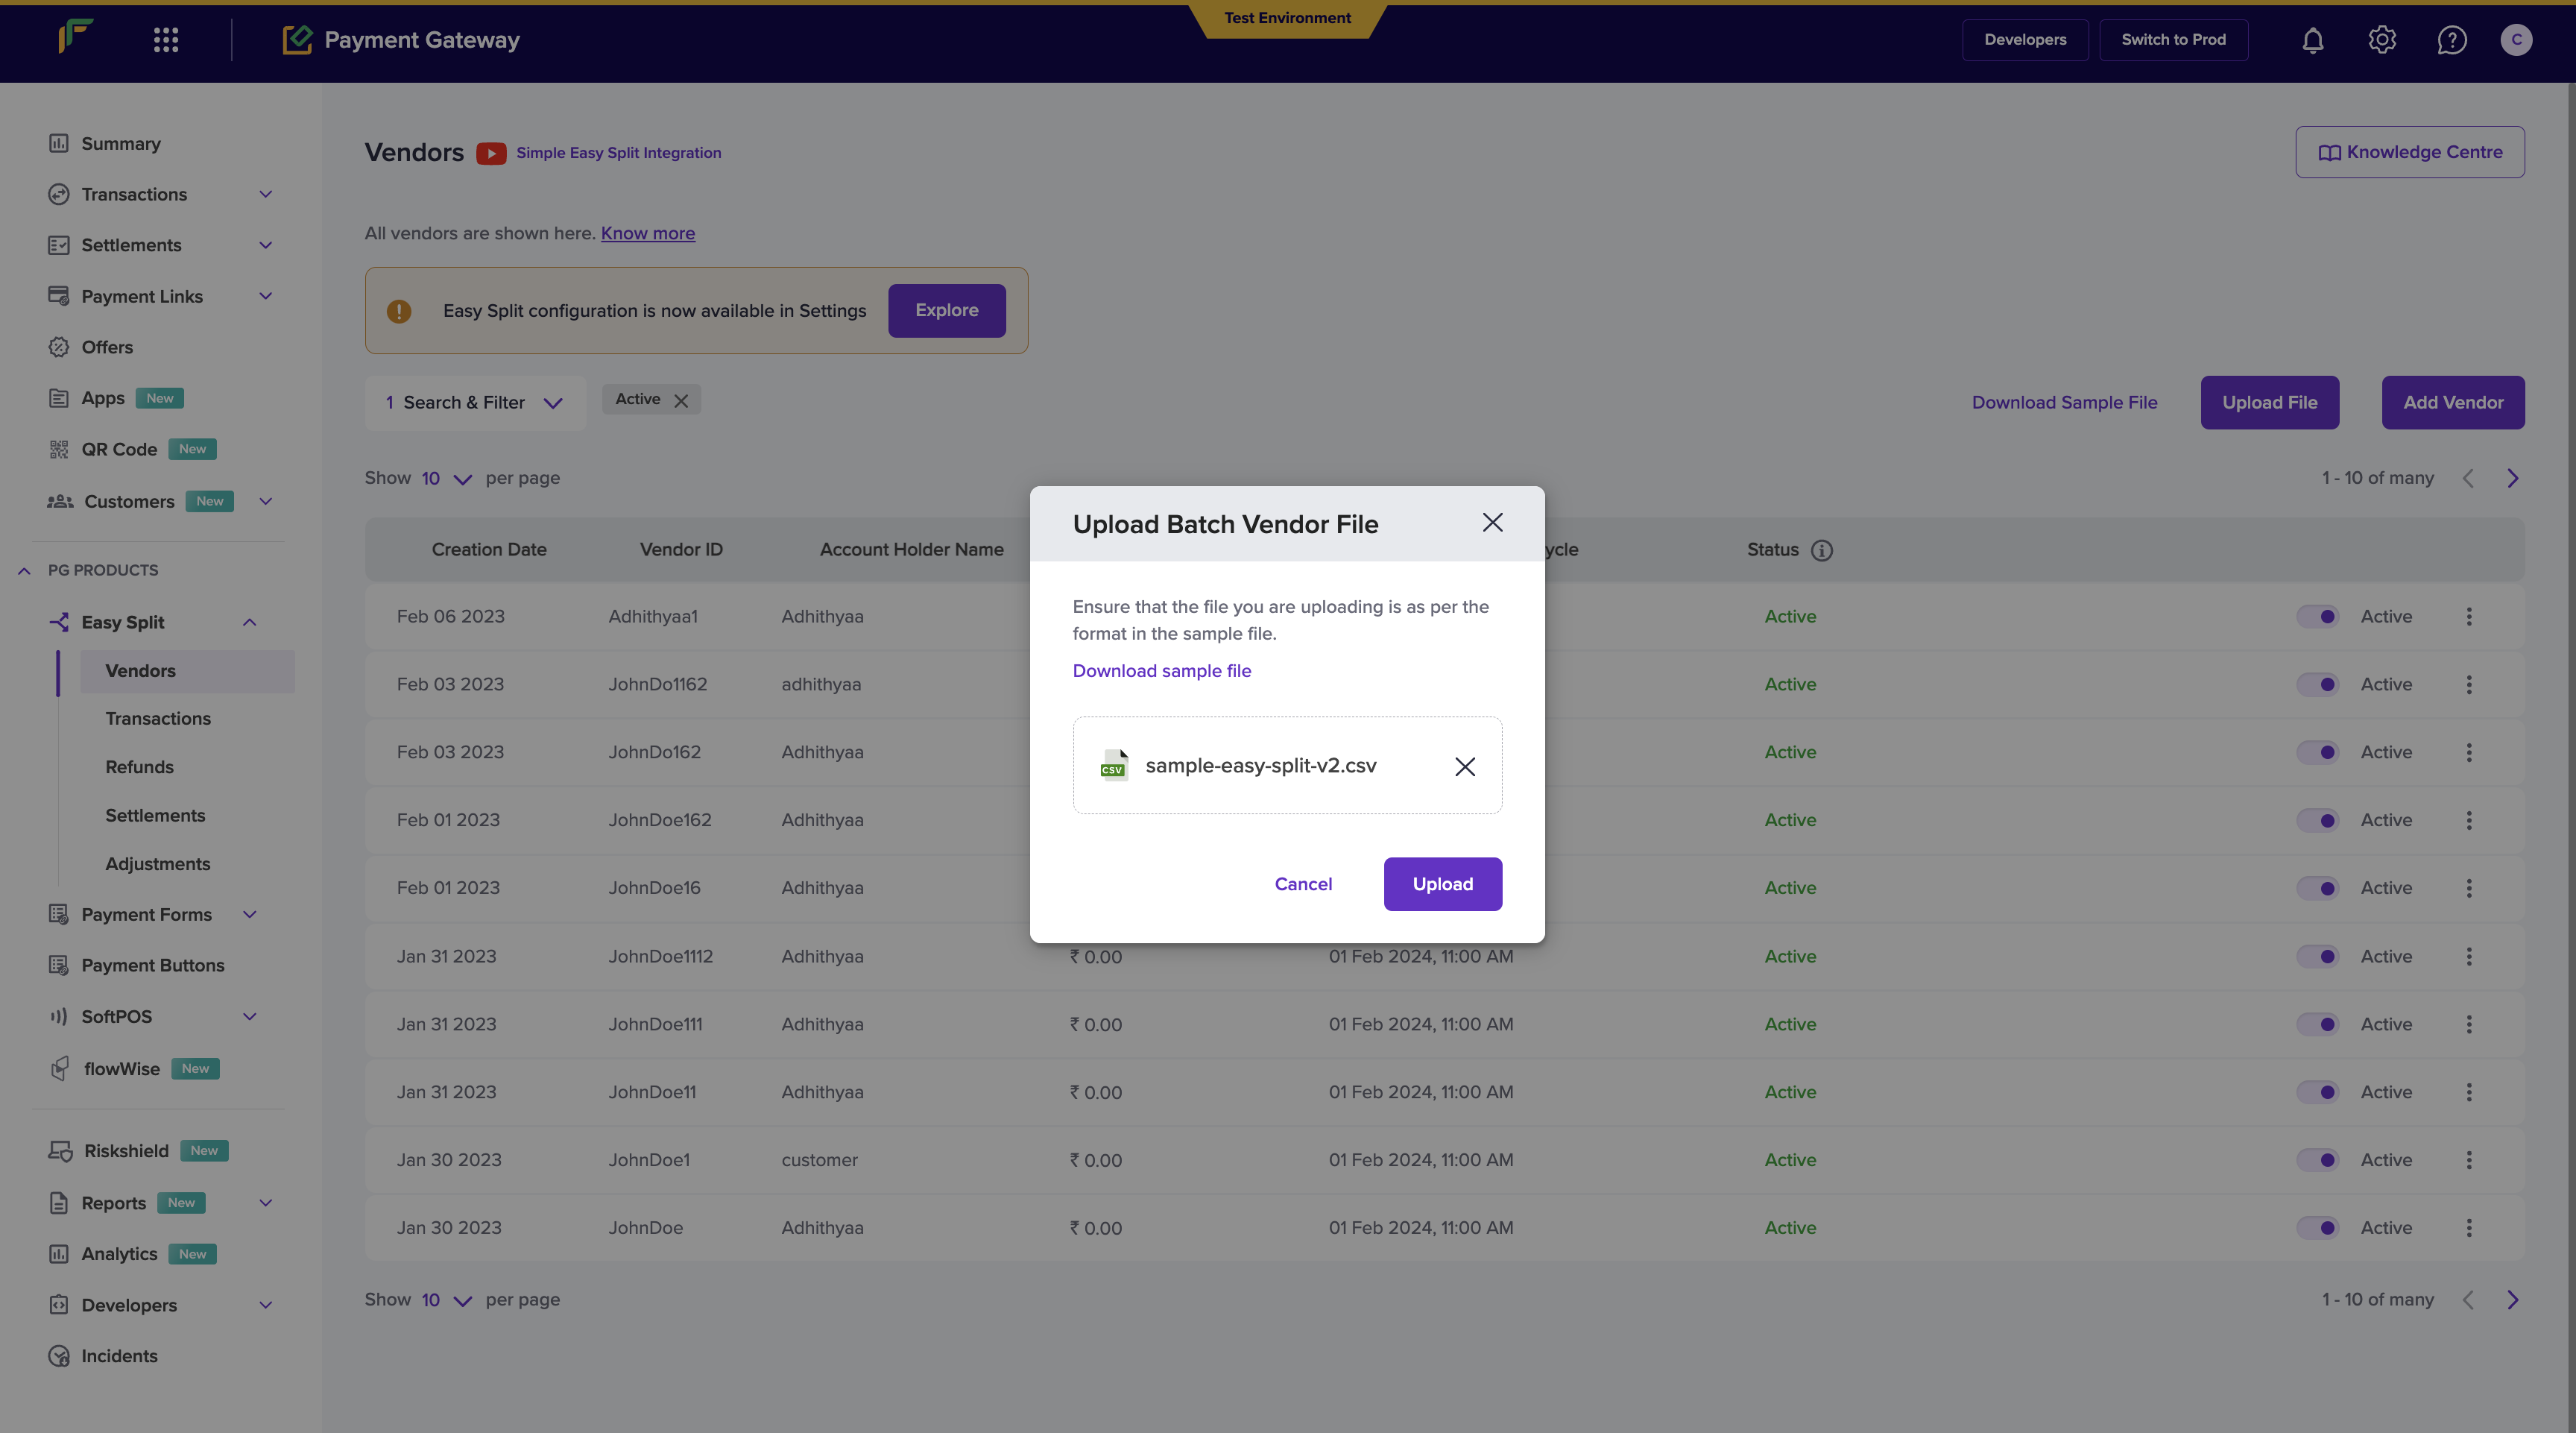
- Click Choose a file to select the file you want to upload and then click Upload. After successful processing, all vendor details will be added, and you can start processing payments to these vendors.
- The maximum file size allowed is 8 MB, and a maximum of 50 records can be included in the file. - The file cannot be uploaded if it is not as per the suggested format. Also, if there are any errors in the uploaded file, you must resolve all the errors and upload the file again.