

A subscription entity represents the customer’s commitment to make regular payments, indicating they are actively using the service and are billed on a recurring basis. The first step in registering a subscription is to obtain authorisation from the customer. When you create a subscription, an authorisation link is provided in the response. You should redirect the customer to this link so they can complete the authorisation process. Once authorised, the subscription transitions to an active state.
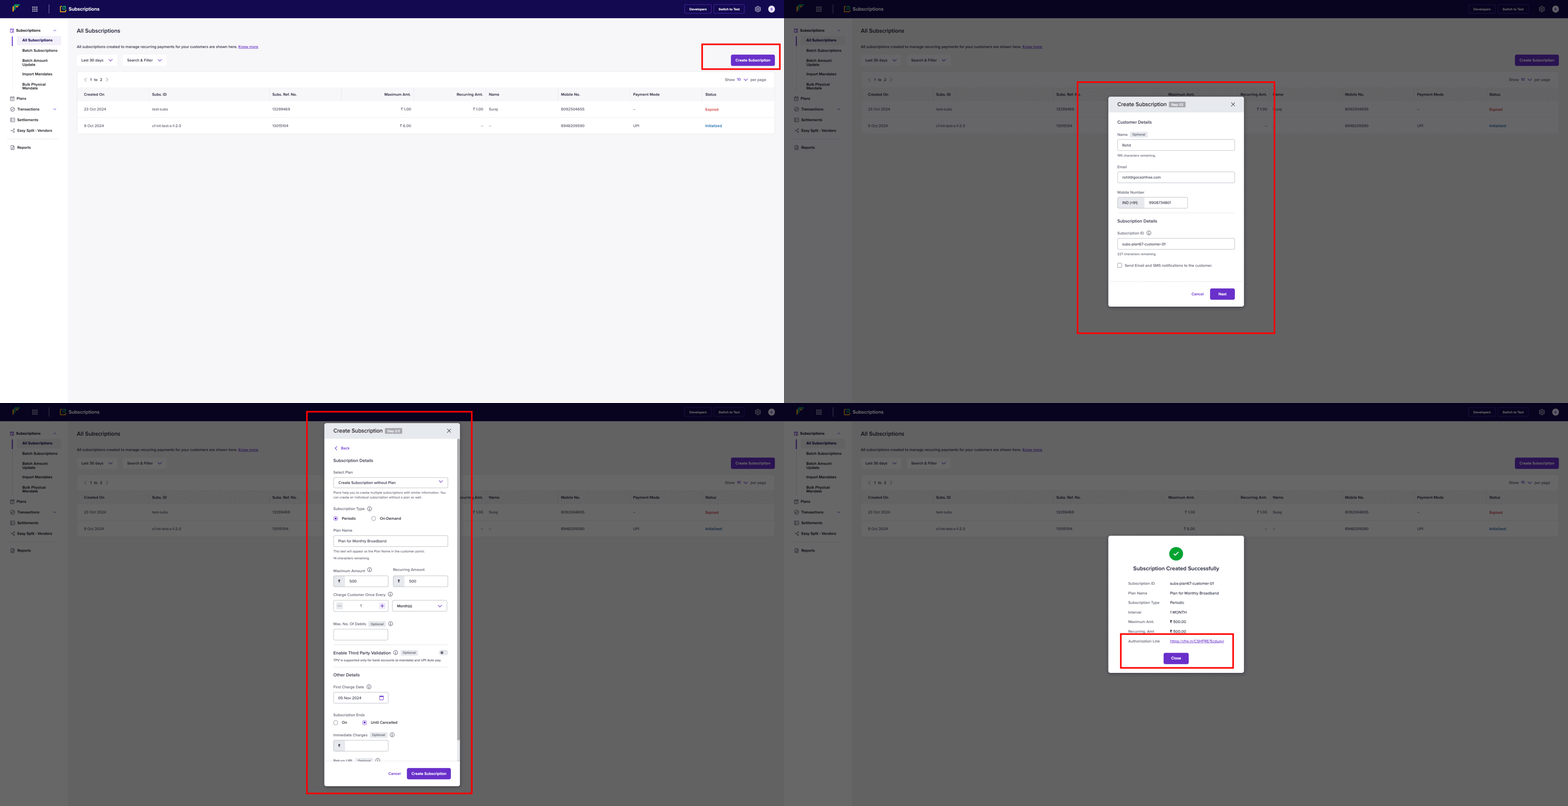
To create a new subscription from the dashboard, Go to Subscriptions Dashboard > All Subscriptions > Create Subscription. Follow the steps as shown in the below image.You can also create multiple subscriptions at once using the dashboard. Go to Subscriptions Dashboard > Batch Subscriptions > Upload File to upload a file that contains all the information required for multiple subscriptions.
Authorisation Lifecycle

Before a subscription becomes ACTIVE, it must be authorised by the customer. Authorisation indicates that the customer has completed the initial payment (if applicable) and successfully subscribed. If the customer doesn’t complete payment within a certain timeframe, the subscription link will expire. Below is a visual diagram illustrating the different states during the authorisation process.

Subscription Lifecycle

A subscription can go through various states once it is created. They are explained in the table below: